Showing posts with label Projects. Show all posts

Monday, August 12, 2013

Kitchen Make-over

Before we moved into our house the Land-lord (that sounds weird calling them that because we go to church together and they are our friends…) asked me if I wanted the inside of the house painted any specific colors. Since they had to paint anyways it might as well be something I liked, right? Well I chose a Butter Yellow with White trim for most of the house.DSC01881 This picture was taken soon after we moved in so please excuse the poor quality :/

I also chose a specific color for the kitchen…. I’m not sure what I was thinking when I picked it but I did and it was bright…

Be forewarned!

DSC01887 HELLO! YELLOW!

Like I said… its bright! :) After about a month of the bright yellow it was time for something different (Sorry this is a really old project but one I thought you all might like to see)

DSC01916 Much calmer don’t you think? Oh, and we also got a new fridge, the old one died :( The plan now is to put some white open shelves on this wall for plates, cups, canisters and a few pretty things. That’s a project I’m hoping to have done before my parents come for a visit! {that was my subtle hint for Kenny, in case he’s reading this}

DSC01918Don’t you think this is a better color choice? It is just so peaceful and relaxing (compared to the above) and it looks great with the butter yellow and white that goes through the rest of the home. This is the same green that was used in the guest bathroom and, believe it or not, only one(1) gallon of paint was used for both rooms and there is still some for touch-ups later!

I am completely enjoying all the newness of decorating the house and turning it into Our Home! Can’t wait to show what’s next!

~Bex

Saturday, August 10, 2013

New Stuff

Just finished revamping the All About Us page and the Projects page here on the blog if your interested in taking a look. In the projects page I did a quick run-down of some of the blogs I've been following. You can see all of those on the Left hand side of the home screen. Hope you'll enjoy and give me some feed back or suggestions on how these pages would be better.
Have a great weekend!
~Bex

Monday, March 4, 2013

Home Improvements – Paint!

I knew when we moved in that I wanted to paint both bathrooms, they both have white or cream tile with silver fixtures and looked very nice that way, we definitely could have left them alone and they would have been just fine.
Here is the before picture, of the guest bathroom, from the night we moved in.
DSC01831 And this is what it looks like right now.
DSC01953DSC01951
Doesn’t it look awesome! I love it! (except for the fact that my hand towels are uneven :/ oops!) I was able to purchase the shower curtain at Kohl's for $5.00 and everything else I had on hand from our first house. I am planning on making a sign for over the toilet but you’ll have to come back to see that – its going to be cute! The only thing left to do in here is find a bath mat/rug and a few more decorations to finish it off. So how about a quick side-by-side for examination purposes.
Moving InIt almost looks like a different bathroom!
Hope you enjoyed checking out my guest bath come back again to see what other painting we’ve been doing.

Linking to A Living Sacrifice Home Improvement Party - Check it out!

Wednesday, January 9, 2013

Packing

I decided to take a break and show you some of our packing progress. To be very honest, at the moment, I feel like I’m doing all this packing but I’m not even making a dent in all of our stuff :/ what’s worse is I also feel like I’m in a non-stop mess! But don’t worry I know I’m making progress and things will look a lot better around here after the “Donate” pile has been hauled off and the “Sell” pile is going down. Any ways here are some pictures if your interested… and some helpful (at least I thought they were) moving tips I’ve gotten all over the place!

DSC01753 The “Donate/Sell” Pile – it pretty much takes up the whole room!

DSC01752- My Packing Station -

DSC01754  Former “Man Cave” now my stash for already packed boxes.


Now here are the Tips:

  • DSC01755 Use small boxes to pack books. This may sound like an inconvenience to pack several small boxes with books but them being small will save your back later as you load and unload your truck! FYI we went to our local grocery store and asked for milk boxes and they gave them to us for free! Can’t beat that deal. – This back saver came from Pastor Mike Haley, being a Pastor he has moved a lot of books through several different moves so I think he would know how to best do that.
  • Wrap/Pack glasses, dishes, and breakables in plastic grocery bags. They are way cleaner than newspaper and allow for a tiny bit of jiggle room in your boxes so things are less likely to break (of course you still want to pack things tightly) and for the best reason, they are free at the grocery store just start saving them as you purchase things and ask your friends to do the same. – This one comes from my Grandma who has moved many, many times and has experienced little to no loss of her numerous dishes!
  • Pack dresser drawers (any drawers for that matter) and cabinets as full as you can. No sense in wasting that empty space, fill it with things you are taking with you any way. – I think this one came from my Mom who moved around a lot as a child/teen/young adult.DSC01751
  • Place pictures and other flat items in-between blankets, sheets and pillows to keep them protected. Just be careful when your un-wrapping! – this one came from my friend, Sabrina, who has also moved several times with her former Marine hubby.
  • Use the “Color Coding” system. Pick a color for each room of your new house, (i.e. Yellow – Kitchen, Blue –  Garage, etc.) then label your boxes accordingly – I got this hint online somewhere but I can’t remember where so I could give them credit for an awesome idea
  • On my colored pieces of paper I’ve also been labeling what is in each box so when we get there it will be easier to find what is needed instead of having to unpack every box right away. – This one is from Mom (she’s a super woman when it comes to packing things!)

Well that is the end of my borrowed brilliance! Any other tips I should know or could add to my list?

~Bex

Some More Pinterest Projects

With preparing to move I’ve been using some of my Pinterest pins off of my board Around the Home – Cleaning board. Here are a few that I’ve done.


how to clean your dishwasher


Cleaning Your Dishwasher

I know, why would you clean your dishwasher? Well read the post and you’ll find out why. My dishwasher didn’t look too dirty until after I cleaned it and now it is sparkly white! And this method gets rid of any musty/mildew-y smells that may be present when you move into a new place. Definitely worth a try!


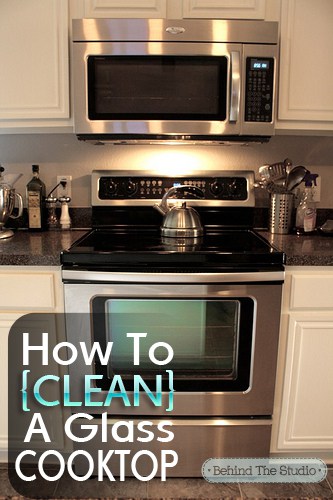
Cleaning Glass Cooktop with baking soda and water #cleaning


Cleaning Your Glass-top Stove

I actually used this method on our stainless steel stove at work and it didn’t quite get everything off but I also didn’t have a lot of time to spend on it. I’m planning on trying this on our regular stove around the burners where things get cooked on and look kind of yucky after a while.


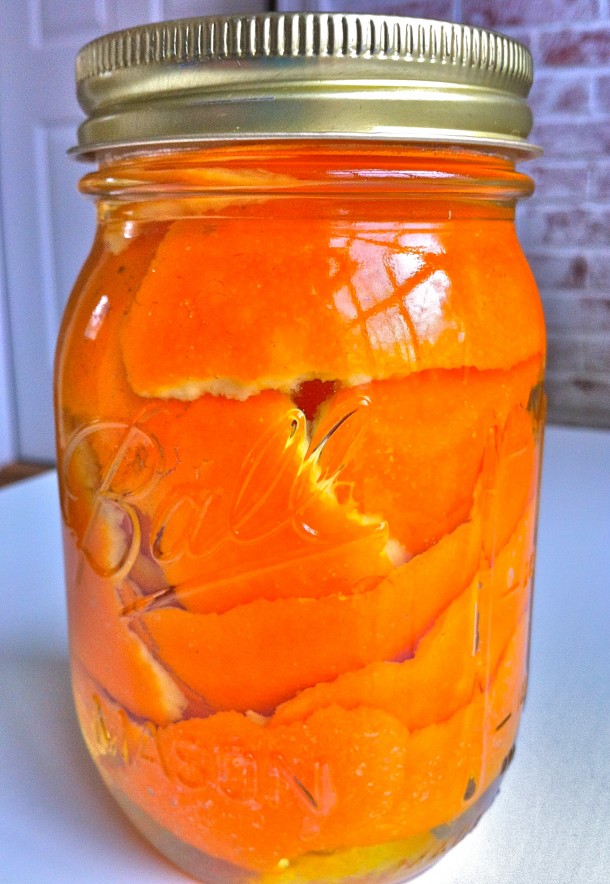
Making "Orange Vinegar"

I use vinegar or baking soda for almost all of my cleaning and I’ve gotten used to the smell. – FYI if you’ve never used vinegar for cleaning that smell goes away after it air dries. – But if your not convinced this is a good easy recipe to change the scent. If your just really sensitive to the vinegar odor your probably still going to smell the vinegar a little but for the most part its just orange-y. Also, I did not notice any difference in the effectiveness of its cleaning, the only thing that changes is the scent.


Cleaning Your Washing Machine

Again, the question, why? Same answer, read the post! For this one my water was not flowing right, soap scum or something was plugging it up or something so I gave this a try. You would not believe how nasty looking the water was while it was soaking the first time, I was amazed! The benefits of cleaning your washer, for me, was fresher smelling laundry and my water flows better. :)

Saturday, April 7, 2012

Flylady Update – I made it!

Ok, so, at the end of February I had a post written (that somehow never got posted :S ) to let you know that March was going to be a crazy busy month for us so I probably would not be doing much (if any) blogging but I was going to keep up with my baby steps and try to make it all the way through to day 31. It was going to go something like this…

Hey everyone, February is going to be a crazy busy month for us so I probable won’t be doing much blogging. I do plan to keep up with my baby steps…”

You get the idea :)

Now that you know what the original idea was :) This is my post to let you know that I {FINALLY} made it all the way through all 31 baby steps! YAY ME! I know it seemed like I would never make it at the rate I was going but one thing I have learned is that they are called baby steps for a reason – your supposed to take your time and make them stick.

After finishing all of the baby steps I’ve also realized that I don’t need to declutter as much as she had on her list. Kenny and I don’t have a lot of things as it is and we kind of like it that way. {SIMPLE} is our motto! So I wanted to show you what I did decide to keep on my “Daily TO-DO” lists :)

DSC01509 

This is the first page of my control journal (which I’m still learning to use) but it includes my morning routine. Later on, hopefully next week I’ll go through my “Before Bed routine with you but my Mornings go kind of like this:

Morning Routine

  • Make Bed – our, unwritten, house rules on this one is: The last one up makes the bed. I’m usually the last one up so I almost always make the bed but that’s ok :)

DSC01502

  • Get dressed to lace-up shoes including fixing hair and putting makeup on – ok so I get dressed but I usually keep my slippers on if I’m going to be home most of the day :) 
  • Swish-n-swipe. This is a quick wipe-down of the mirror, sink area and the toilet. –Yes, that is my toilet bowl brush and it works amazingly well :) I got it from the flylady store for Christmas :)

DSC01507

  • Eat Breakfast, drink water and take vitimins.
  • Empty the dishwasher – I’m constantly putting dishes in the dishwasher all day so they don’t sit on the counter. Then, during my Before Bed routine, I start the dishwasher if its full so the dishes are nice and clean the next morning.

DSC01512-001

  • Check Calendar - Our schedules are constantly changing so I’ve started using a free, online calendar from Cozi.com. Since it is an online thing Kenny and I can both add things to it from a computer or from our phones so we stay on the same page – now if I could just get Kenny to actually use it :)
  • What’s for Supper? – This is a hard one for me, because I’m not very good at thinking ahead, but, once again, I’m working on it :)
  • Start Laundry – Yes, this is an everyday thing – a load of laundry a day keeps me from having to spend my day off doing nothing but laundry :) Everything gets sorted into these baskets and I just pick the fullest one to wash – usually its the colors, Have I mentioned Kenny likes red? :)

DSC01514-001 BTW Mom G. this was my first project with the Cricuit :)

That’s pretty much it for my Morning Routine – I can have everything on this list finished in just over an hour.

Does anyone else have a routine they follow in the morning? Does it help you save time?

Wednesday, August 17, 2011

Teen Room

I still have a couple more things I’d like to do to this room before I’m “Finished” but here is what I’ve done so far.

 DSC01070DSC01069 

This is what the teen room door used to look like, front and back (actually this is Kenny’s office door front and back because I forgot to get the original pictures before, but you get the idea).P8170002-1

This is the inside (back) of the door. I used Chalkboard paint on the door so when the teens feel the urge to color on the door they can now wash it off when they are done. Also its been a great place to post notes to the teens about memory verses.

We have some bright colored paint that was used in the children’s Sunday School classroom I think I might use as a border around the edge of the door. It just feels like its missing something.

P8170001

Here is the front of the door where the teens and their parents can see what activities are coming up soon and how they are doing in the points area.

I have plans to make little ninja’s out of scrapbook paper for each of our teens to post their points on.

P8170003


This is the wall next to the door. It will be used for a collage’ of our different youth activities.


P8170004I didn’t set this up but I think its a great idea. this is where the teens can get information on different Christian and Bible Colleges. And of course its set up near the well used foosball table :)

Those are some of the projects I’ve been working on and I still have some left to do but I’ll keep ya posted!

Thursday, August 4, 2011

Updates and Projects

We have had a TON of stuff going on recently and I feel like I haven’t been able to catch my breath! Summer has gone by like a whirlwind and I haven’t gotten half of my glorious “to-do list” done! Oh well :)

I’m going to try to do a post this weekend about how camp went so your going to have to wait on that one. However, I am going to let you in on some projects I have going for the RU ministry, the Youth Group and finally the house.

For RU (Reformers Unanimous, drug addiction program): They give out a lot of rewards for challenges completed, attendance, memorizing scripture, etc. So Pastor Haley came to me and asked if I could create a poster or bulletin board to show who has earned which reward, kind of an incentive for those not doing so well in the program to step it up a notch. Here is what I came up with:

untitled

On the right side is a list of all the rewards you can receive and a brief description of how you get it (Psalm 23 pin = Memorize and quote Psalm 23) simple right? the colored squares at the top of each row are name tags that are attached with Velcro. (Not trying to sound heartless but in this ministry people come and go so if a person stops coming we can easily remove their name and put someone new in that place without messing up the whole chart.) Lastly, the colored dots, when a person earns a reward a colored dot is placed in their section by the rewards name. (once again it is taped on so it can easily be removed if needed.) So what do you think?  I’m still in the beginning stages of putting this together so I’m open to any comments or suggestions that would help make this better.

For the Youth Group: Sorry but I neglected to get pictures but I’ll try to paint you a verbal picture until I get pictures later this weekend.

First, the church had some leftover Chalk board paint that was used in another classroom so I painted the back of the door with that and I’m going to go back and add a painted color border with leftover neon paint that was used in the Children’s Sunday School room.

Next, I made a Ninja score board with little ninja’s for each teen on it back in January.Ninja Points Since we have a couple new teens my plan is to make more “ninja’s” and instead of having a score board I’m planning on putting the ninja’s on the wall or on the outside of our door (the side that faces the hallway) and put their weekly total points next to their ninja. I like the idea of putting the ninja’s on the door because the teen’s parents can see them and hopefully be encouraging their teen to do better. Is that an evil plan?

I also have plans of making a collage of the different youth activities we’ve done on one of the walls in our teen room.

Our House: I confess I’ve been waiting to show pictures of our house until I had everything “just perfect” but I’ve come to realize that that endeavor may take a lifetime to achieve! So starting next week (hopefully) I’m going to start “Take a Tour Tuesday” and each week show you a room or an area of our house. The plan is, after I finish showing you the house, to start showing you things we are doing to make our house more like home. But real quick I want to show you the sign I put together today for our Laundry room.

Laundry Room Sign I thought this would be cute on a red mat in a black frame. I especially like what it says because our laundry room doubles as the back entry :) I hope no one takes this literally, that could cause some embarrassment! :)

Well, there you have it! I hope you enjoyed seeing the beginning stages of my projects and that you’ll leave some suggestions about what we could do with the RU Rewards Board and the Teen Room (I LOVE feedback!)

Tuesday, May 24, 2011

Wedding Projects

So I haven’t been doing a lot of blogging lately but I have been getting some projects done that I thought you might enjoy!

P5160001Project #1 - Pearl hair pins.

My hairdresser for the wedding thought it would be nice to have flowers or something in my hair, since my dress has pearls on it I made my own designer hair pins! All I did was put a dab of hot glue on the hair pin and then set one or more pearls in place. to cool I grabbed the closest thing to me…. don’t laugh, it worked really well I thought! :)

P5160004

Project #2 – Flower girl dress.

This is my Mom, a.k.a. Master Seamstress. As I’ve been playing with hot glue she has been working very hard on the flower girl dress and it is almost finished, I’ll have to post a picture of the final product.

P5170008

Project #3 – Ring bearer pillow.

Believe it or not I didn’t use one drop of hot glue for this whole project! Aren’t you proud of me? My family was because I hand stitched the ribbons in place, Mom used the sewing machine for the edges, then I stuffed it and sewed up the rest. It was a lot of fun. By the way, that is not one of our real wedding bands tied to the pillow, just a cheap, silver band I had in the jewelry box.

P5240013

Project #4 – Bird seed and Tulle Circles.

This is pretty self explanatory, The thin ribbon(1/8”) we cut about 7 inches long and the wider ribbon (1/2”) is around 9 inches long. When I told Kenny that I was putting these together he asked why we were supplying our guests with ammo! 


P5170011

This last picture is (left to right) the Unity Candle, Program basket, Mrs. Spencer’s supply basket – she is the “Day-of-wedding-coordinator” and as such she needed some supplies…Final payments and thank you’s, tape, breath mints, band aids, Tylenol, handcuffs and brass knuckles for unruly guests, etc. :) and once again the ring bearer pillow. Can you tell I like polka-dots yet?

Thursday, April 21, 2011

Thankful Thursday – Good Friends & Family

I know one of my first Thankful Thursday’s was about friends and I’ve done one on family before too, but I just couldn’t pass up telling you some more!

On Thursday evenings Kenny usually comes down after work to spend part of his weekend with me and sometimes we get together with Brittney and Stephany, two good friends of mine since grade school! This particular Thursday Stephy had to work late and I was going to be at Emmanuel with Kenny on Friday and Saturday for our Youth Lock-in and an Anniversary Party, so he didn’t come down. But Brittney still came over, poor girl, and I put her to work she volunteered to help address invitations.

I have truly been blessed by all the people who have pitched in to help with Kenny and my wedding!

Mom, Brittney and I sat at our Dining room table and watched “The Inheritance” while we addressed all 175 invitations – I actually don’t know the exact number we addressed but we ordered 175 to make sure we would have plenty.

P3310002

Thank you Mom and Brittney for all your hard work!

Wednesday, April 20, 2011

DIY – Bath Soak & Sugar Foot Scrub

Ok as of right now none of my bridesmaids or ladies helping with the wedding can read this post! :) Just Kidding :)
I mentioned yesterday in my quick update on our lives that I had made gifts to give out at the wedding and these are two of them. First I show you my really cute jars and then give you the recipe’s for the Bath Soak and Sugar Scrub (so if your just here to get a really good, easy-peasy recipe’ you now know where to find it!)
P4180012

First, I measured the jar lids and drew all the circles on the back of scrapbook paper then cut them out. – I told you this was going to be really simple! 


2011-04-18
After that I hot glued just one edge of the label, recipe’ facing down, to the jar lid and hot glued a bow on top of that.
P4180017
Ta-Da!!!! Ok, so this might not be exciting to anyone but me, but I had fun doing this and I hope the ladies receiving these will enjoy them. :)
Now for the Recipe’s
Best Bath Soak Ever!I got this recipe’ from a good friend, who is actually going to be in the wedding, Amanda!
1 cup                Epsom Salt
1/3 cup             Sea Salt
1 TBS               Baby Oil
2-3 drops         Scented oil – I used vanilla, the original recipe’ called for Lavendar, you can use whatever you like and it should work just fine.
Mix together – When I’m making this for myself I dump all the ingredients into an old mayonnaise jar and shake it up until all the salts are blended with the oils.
To Use – sprinkle a couple tablespoons worth into warm bath water and enjoy :)
Sugar ScrubI got this recipe’ from a blog I ran across called Maybe Matilda
3 cups                  White Sugar
1 cup & 2 TBS     Good quality oil – I used Baby oil since that’s what I had on hand for the bath soak but the lady I got this recipe’ from said she used olive oil.
*Mix these together in a bowl before adding Essential Oil.*
10 drops              Essential Oil per jar
I just did Vanilla for each of my jars to keep it simple but if you wanted to do a different scent for each jar you would just separate the mixture above into different containers before adding Essential Oil and mixing.
To Use – This is great if you give yourself a pedicure and want to gently scrub the “ruff parts” off, I’ve also used this on my hands to scrub paint off. Whatever you use it for it will make your skin nice and soft!
Enjoy!
I linked this project up to Handy Man, Crafty Woman

Saturday, March 26, 2011

DIY - Flower Girl Basket

I am by no means an expert on DIYing but its a lot of fun and it has saved me some serious $$$ for our wedding (70 days away!) which is definitely a bonus! I recently made the necklaces for the bridesmaids and flower girl which you can read about here.

Now on to the main event! My sister made her own Flower Basket and after pricing them ($30 - $90) I decided to do the same!P3260046

Items needed:

  • Wicker basket, spray painted white.    $ .25 at a yard sale
  • Ribbon                                                $2.97 at Wal-Mart
  • Black satin fabric                                 $1.65 at Wal-Mart
  • Scissors
  • Fabric measuring tape
  • Straight pins
  • Hot glue gun.

P3260047


 I started out by measuring the inside of the basket ‘height x width x height’ I came up with 13 1/2” x 12” so when I cut my fabric I added  1 1/2 inches to both sides.


P3260048P3260051 

The next step was to role the edge of the fabric under and hot glue just a small section of each “flat side” to the basket.

I have other plans to make the rounded corners look nice :)

P3260053P3260054P3260055

 I decided to pleat the corners using straight pins to get everything “just right” then I cut out the extra fabric off the back, hot glued it in place and removed the pins.

P3260056P3260057P3260059 

The next step was to make the bows for the sides (can you tell I LOVE polka-dots?) I cut 1 foot of ribbon, folded it and sewed it together… I’m kind of speeding through this part because I really didn’t know what I was doing, I claim the trial and error rule for my ribbons!


P3260061 P3260063


 Lastly I took a 1 1/2 of another ribbon to be the middle part of the bow. I sewed one end onto the bow then wrapped the ribbon around the bow, hot glued it in place and then hot glued it to the basket.


P3260066

I went ahead, while I was making bows, and made one as a hair bow for the flower girl! (just hot glue it to a plain barrette or clip) Now just picture this with red petals inside and Valla!

This is something you can do to dress up a plain basket for everyday use too. I hope you got some tips and/or ideas for your next project and if you have any suggestions or comments (maybe some tips to help for the next time I do something like this) I’d love to hear them!